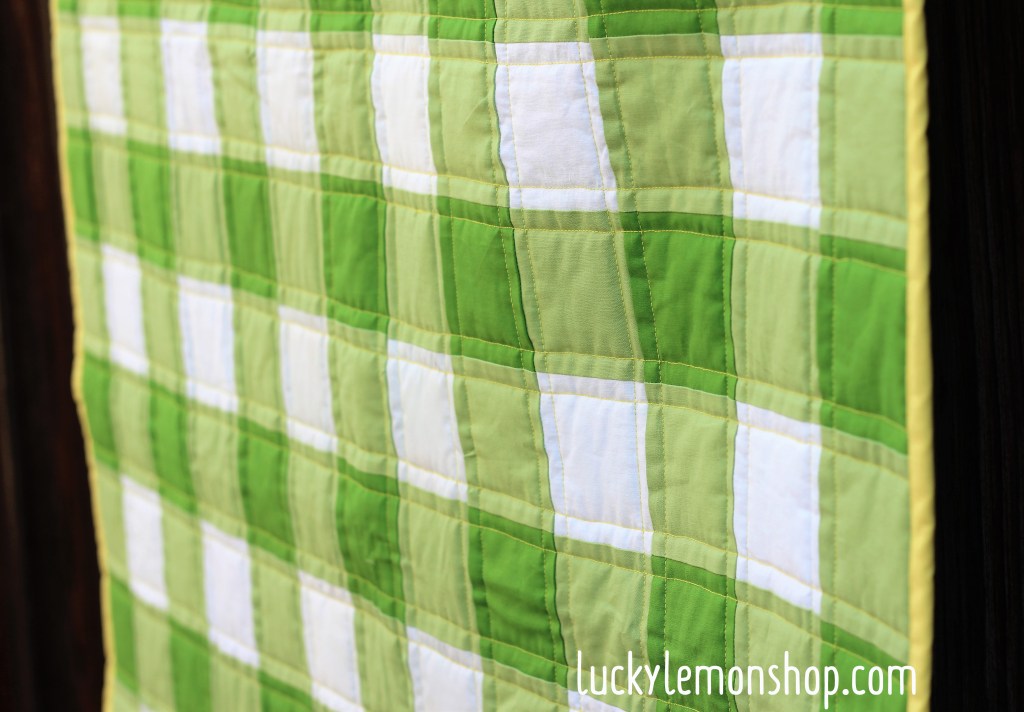


Um YAY!!! You are done making your quilt top, sandwiching it together and quilting it! Congrats on getting this far. Now on to the last and sometimes, the most difficult part of quilting: adding the binding.
I was very intimiated by quilt binding the first few times I quilted and did everything I could to “make it easy”. I used the backing fabric and pulled it to the front to bind it, did a “cheater quilt” where I didn’t have to bind anything, but just flipped the backing around like a pillowcase. All of these worked, but I still wasn’t getting the look I wanted of a true old fashioned traditional quilt.
As with everything I want to learn, I started watching YouTube and devouring everything I could about how to bind quilts well. I learned that there are basically two options. Sew it onto the back first, then sew it onto the front, or sew the binding onto the front and hand stitch it to the back. Since I knew hand stitching would never happen in a timely manner for me, I set about learning how to attach my binding with my sewing machine which is what I want to teach you today!
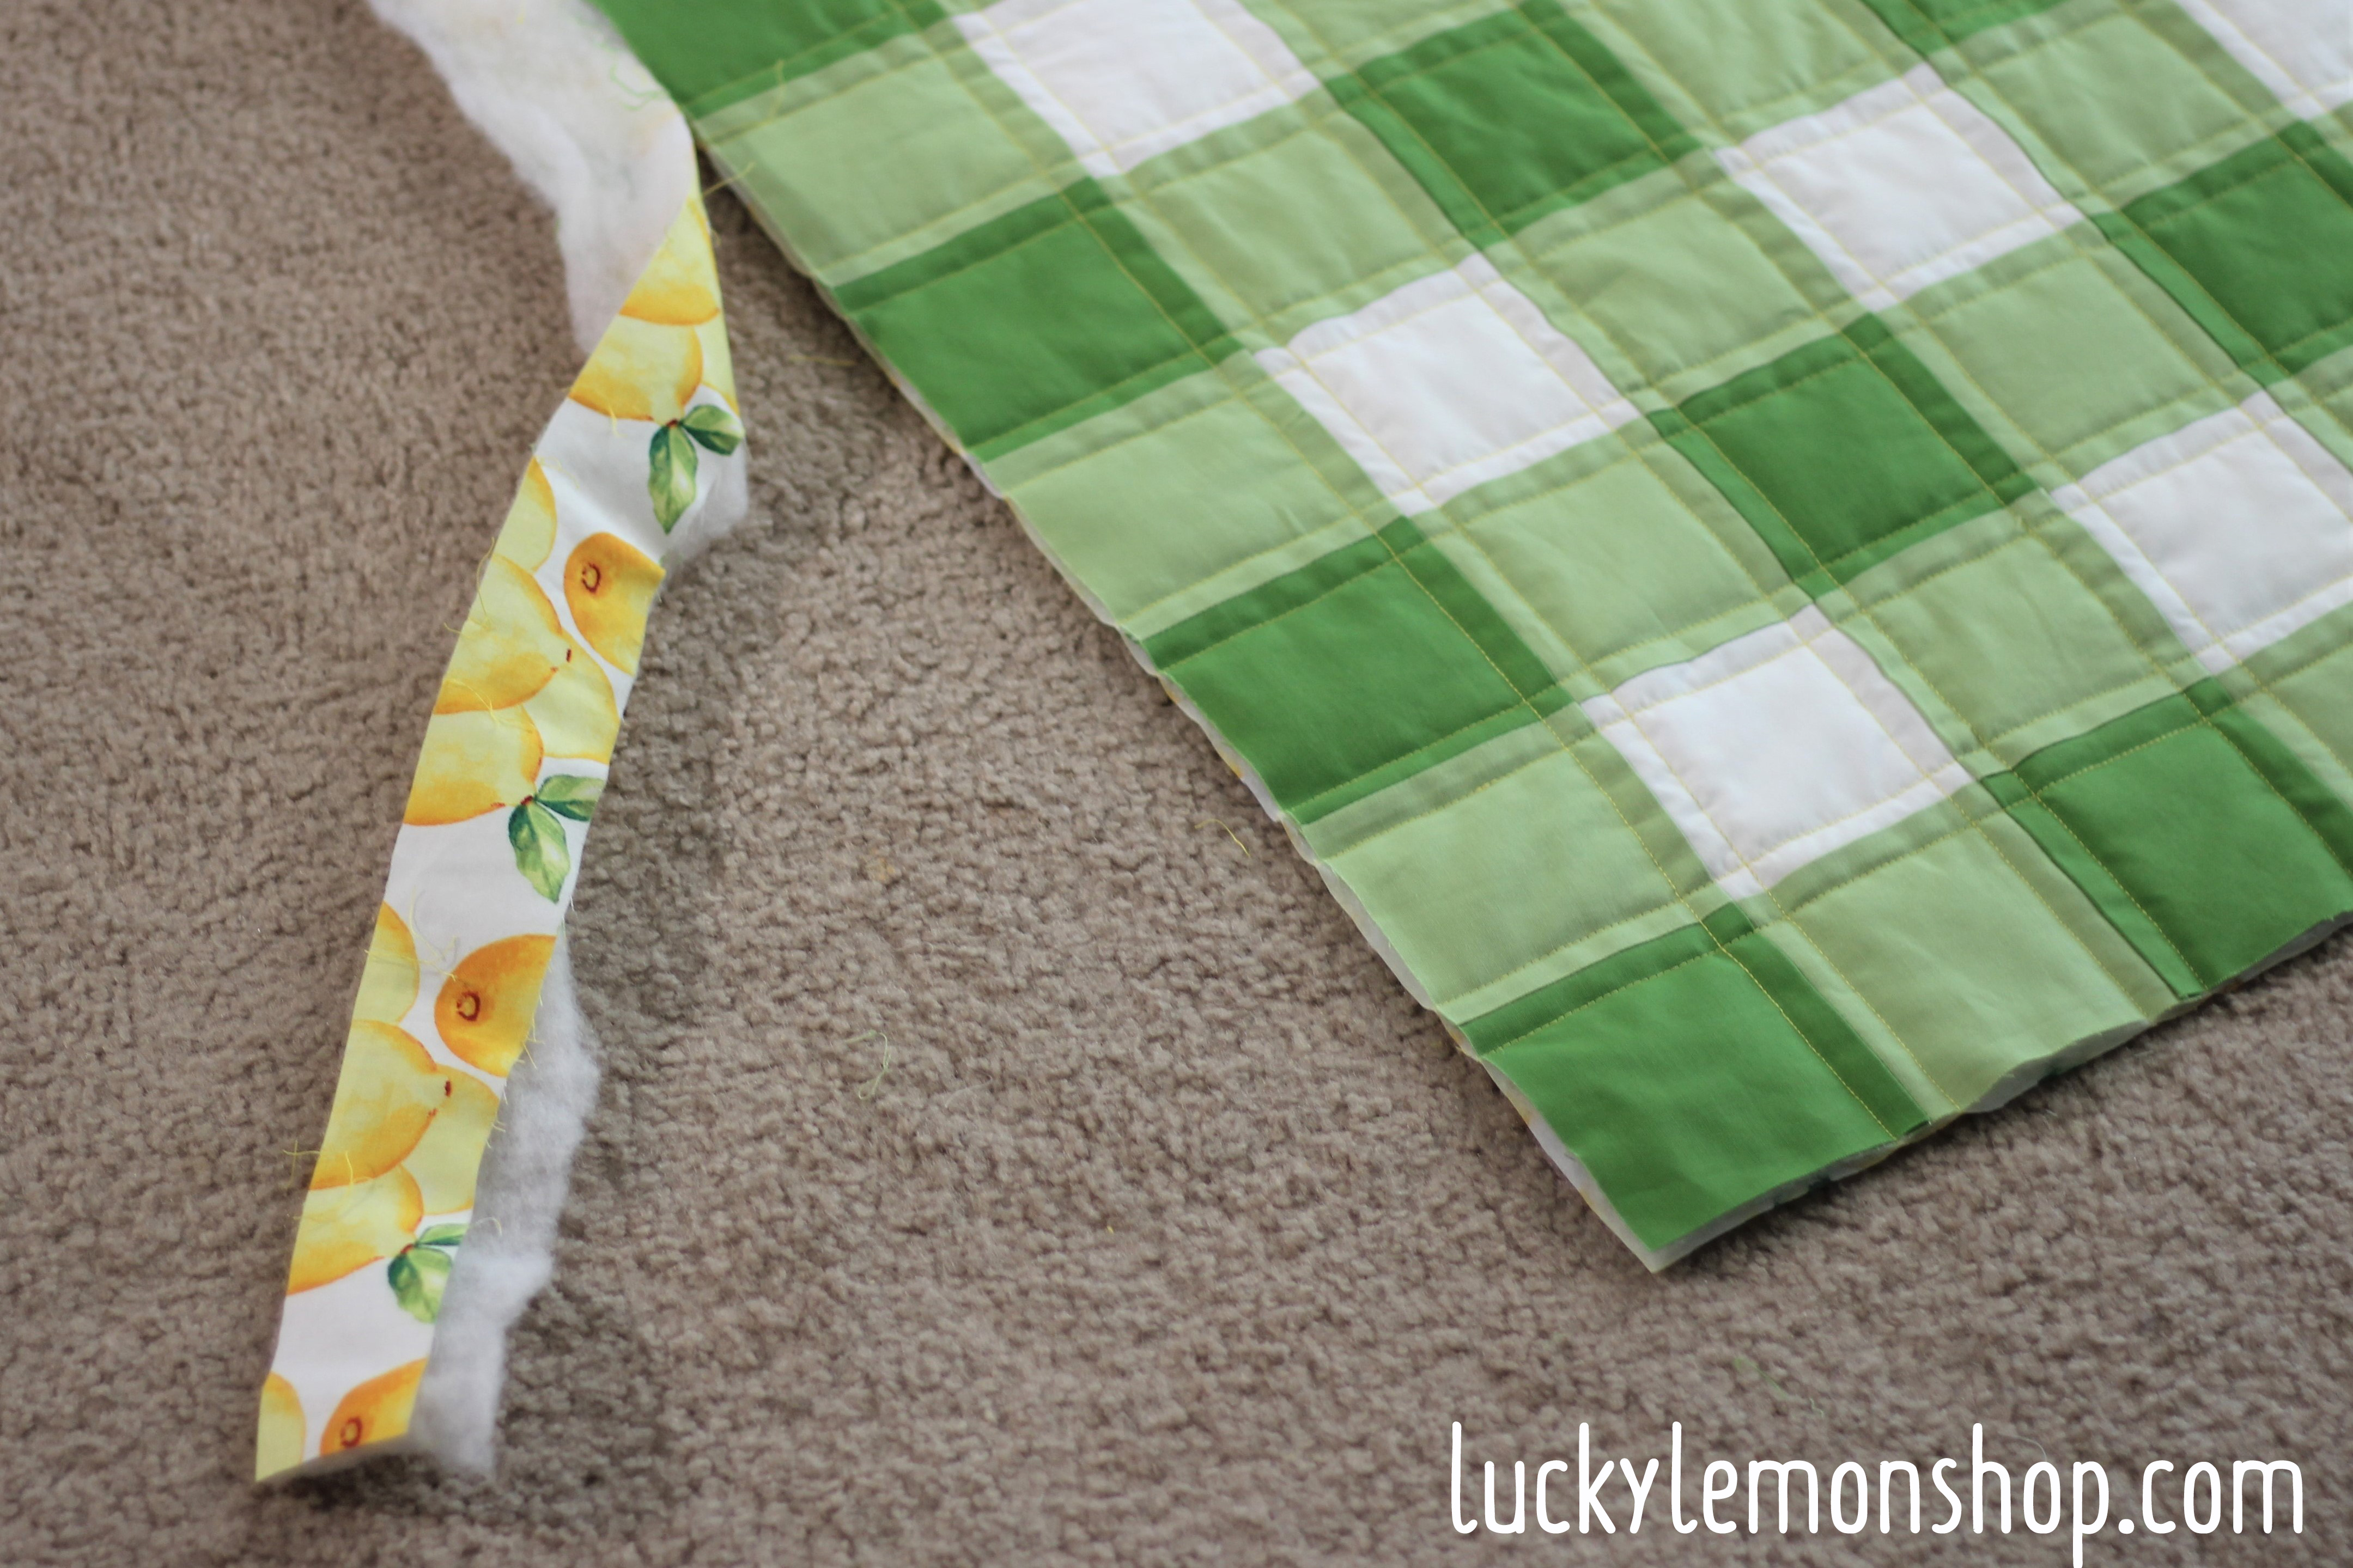
Start by picking your binding! You can buy pre-made binding at the craft store or you can cut and sew together your own. I have done both and prefer to make my own. I have more control this way and can make it match perfectly. I can also choose higher quality fabric for longer wear. To start, cut the extra batting and backing fabric off your quilt to make everything flush and lovely.

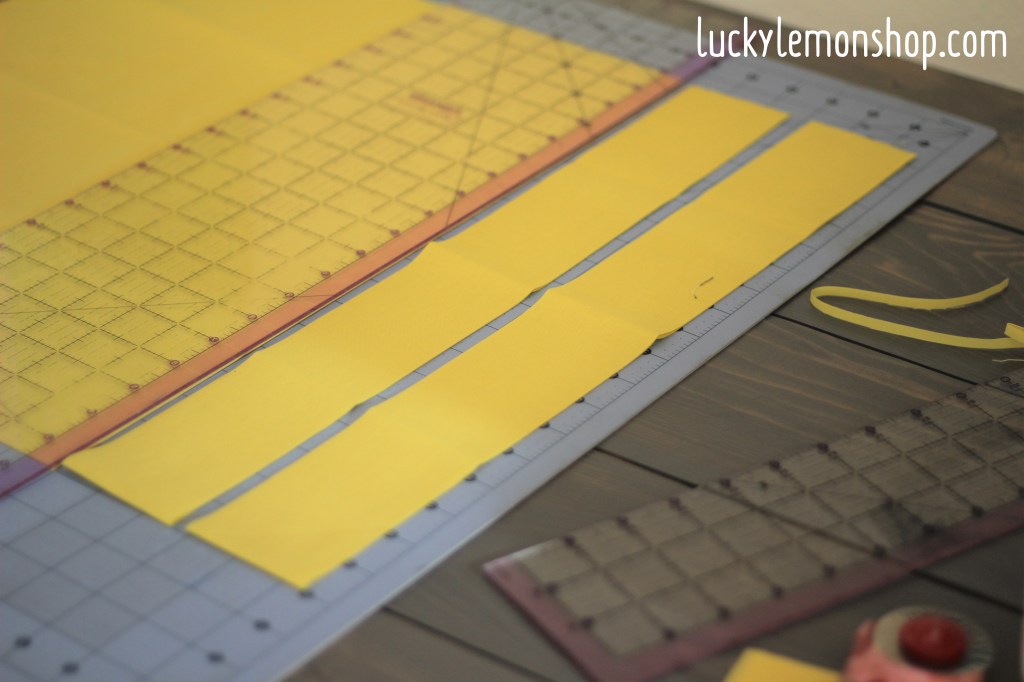
Now you need to cut 2.5″ strips to turn into your quilt binding. First measure the perimeter of your quilt. I make sure I cut enough binding to go around my quilt, plus about 12 inches extra to help out at the corners and finishing it off. I usually use the width of the fabric which is around 42″ and divide it into the inches of the quilt perimeter +12″ so that I can find out how many strips I need.
Example: Quilt size = 60″ x 85″
Perimeter: 60″ + 60″ + 85″ + 85″ = 300″ plus 12″ for wiggle room
Total binding needed: 312″
Divide this by the width of fabric: 312″ / 42″ = 7.4 strips
I always round up, so in this case I would cut 8 strips from my fabric and end up with 8 strips that are about 42″ x 2.5″. Some people prefer to cut their binding thicker or narrower, but start with 2.5″ until you get a feel for it.
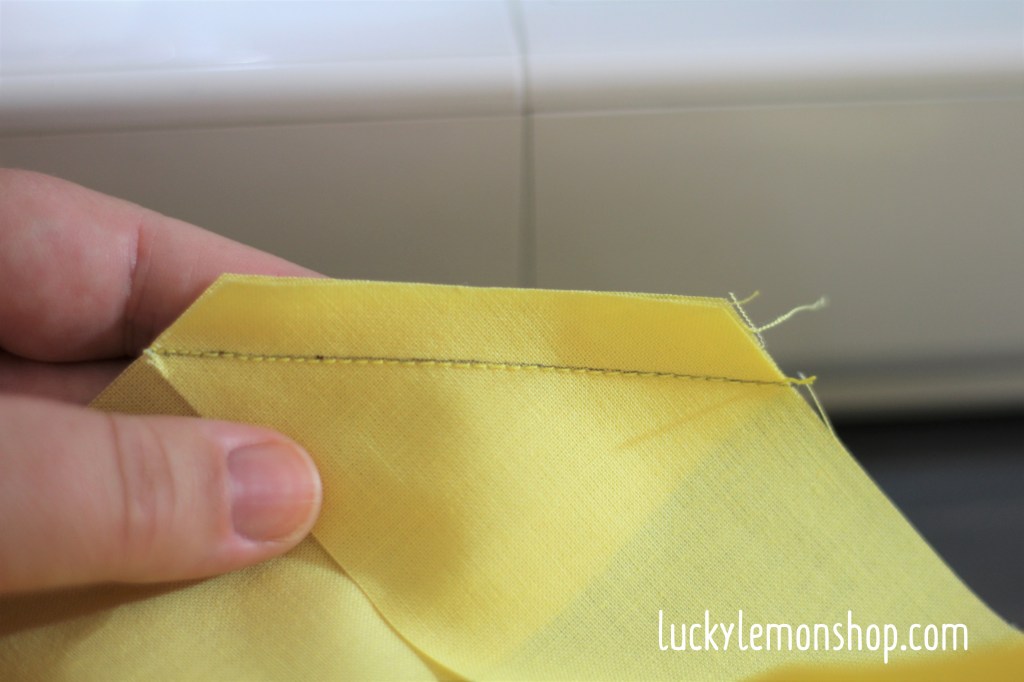
Next you need to attach these strips to make one LONG strip! Cut off the selvages of the fabric if you haven’t already and bring the end of one strip perpendicular to the end of another strip, right sides together. I always keep my bottom strip going out to the left and the top strip going straight down. This helps me stay organized and makes it so I end up sewing them together top to bottom. You need to sew these strips on a 45 degree diagonal. To help you with this you can draw a line or fold and press the little corner edge over so you get a line to follow.

Sew your strips together and get ready to add the next one. If you are attaching solid fabrics, make sure you are careful that you pick a side so all the seams end up on the same side! I sew all of my strips together until I have one long strip, and then double check that all my strips are facing the same way before I trim the little corners of the seams. I tend to use a lot of solids for my bindings and I always seems to mess up at least one strip. With patterned fabrics, just sew right sides together and you should never have a problem.
Next step is to press all the seams you just sewed open. Sewing the binding together on a diagonal makes for more durable seams and less bulk along the edges. Now press this entire long strip in half, the hot dog way. You will end up with raw edges together and a beautiful fold. Use lots of heat and steam to get this a smooth as possible. Pick up your iron and PRESS instead of just rubbing it around to make sure you are not distorting the fabric. If I am not going to be binding right away, I wrap up my binding and secure it with a pin so I don’t have to iron it again!


You now get to attach your binding to the back of your quilt. For this I like to use the same quarter inch foot with a metal guide to help me not go over a quarter inch seam. See my post on nesting your seams for more details about this helpful quilting tool. I purchased my quarter inch foot from amazon here. Give yourself a tail of about 5-6″ of binding at the beginning which we will use later to attach the bindings together.

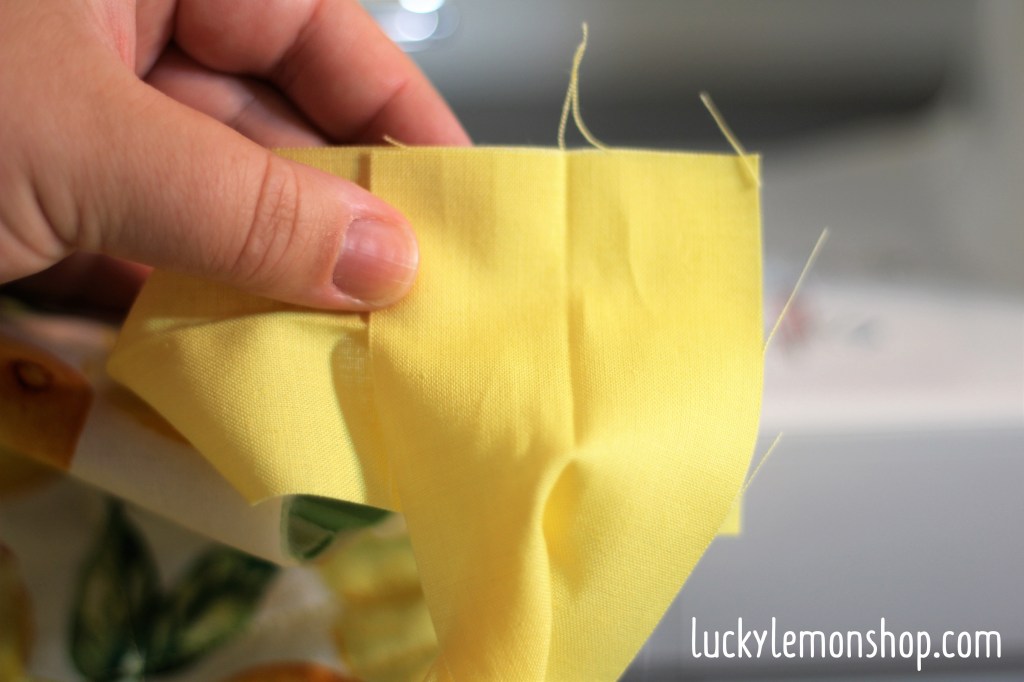
I start at the middle of one side of my quilt and buzz along until you get to a corner… here is where things get interesting! You need to stop sewing a quarter inch away from the edge of the corner, but leave your needle down in the fabric. Pick up the lever to release the foot and pivot the quilt 45 degrees and sew off the edge. It will look like this.
Take your quilt off the machine, pick up your binding and fold it up and out to the right. The line you just sewed gives you a guide to fold the binding out against.
Then fold your binding back over itself so it is going to the left again and you have a fold at the corner. All edges should line up to the square as shown below.

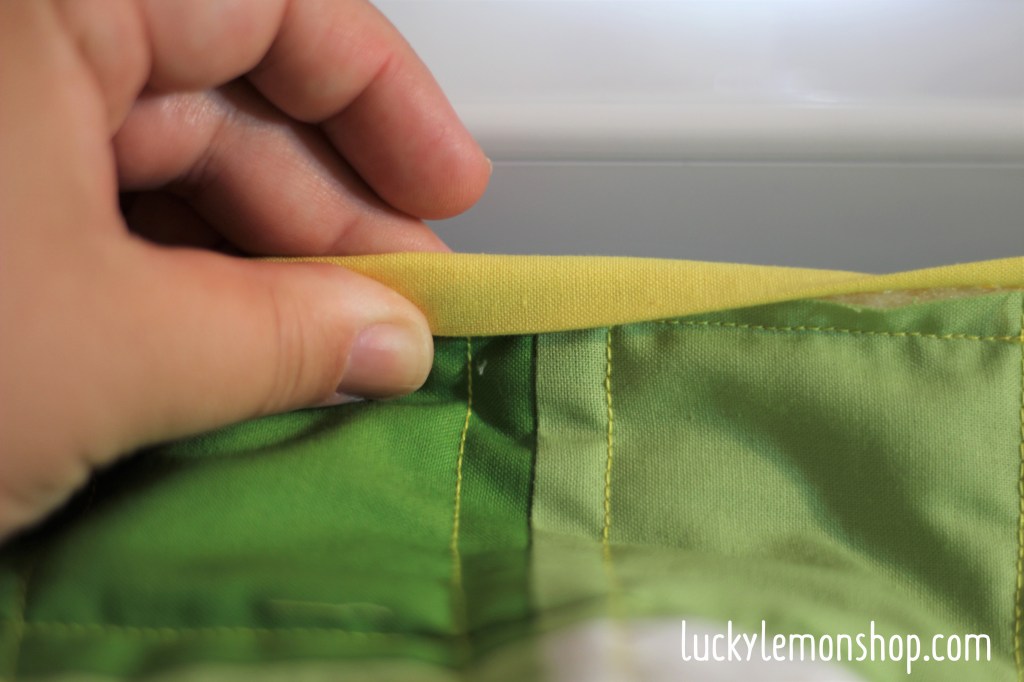
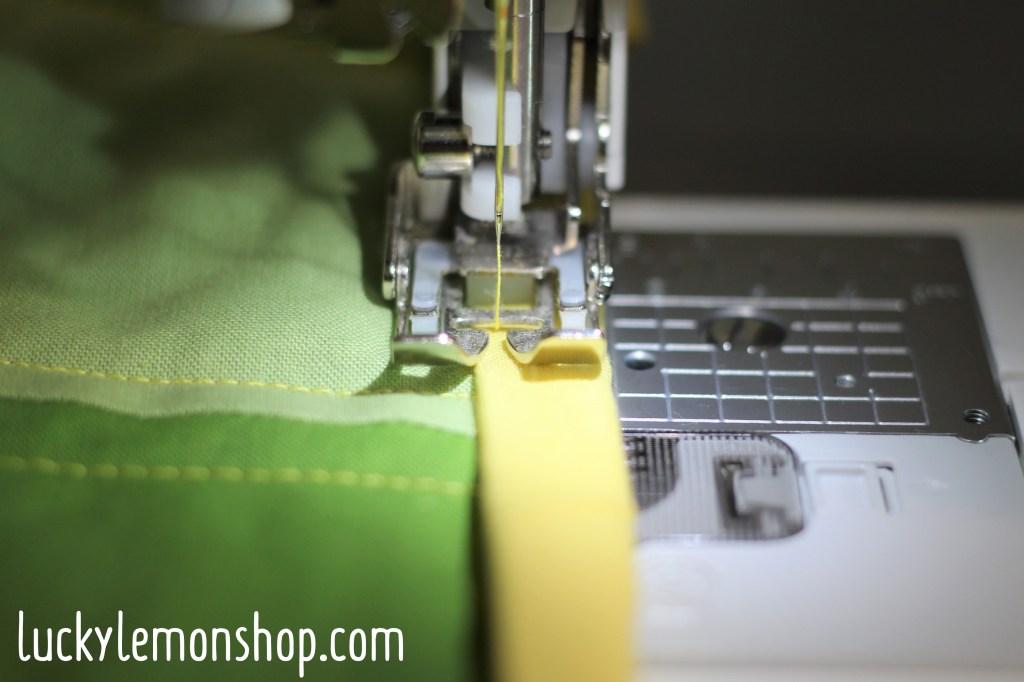
I like to press this as I go to keep all my lines sharp and I use a little clip to hold this in place. These are the clips I like. Now take the quilt back to the sewing machine and start at the very top, sewing down the next side. If you have a hard time getting this line started due to the bulk of the 6 layers of fabric and batting, start 1/4″ in and sew backwards to get those first few stitches.
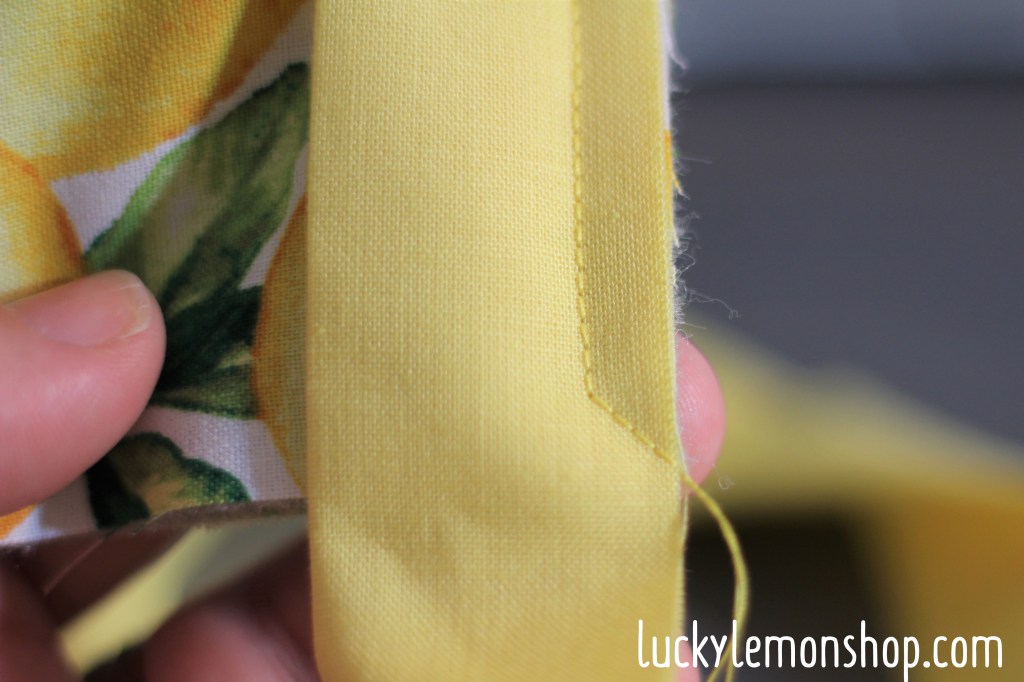
Keep sewing around, doing the same as above to all 4 corners until you get about 8-10″ away from where you started. Here you are going to have two tails.

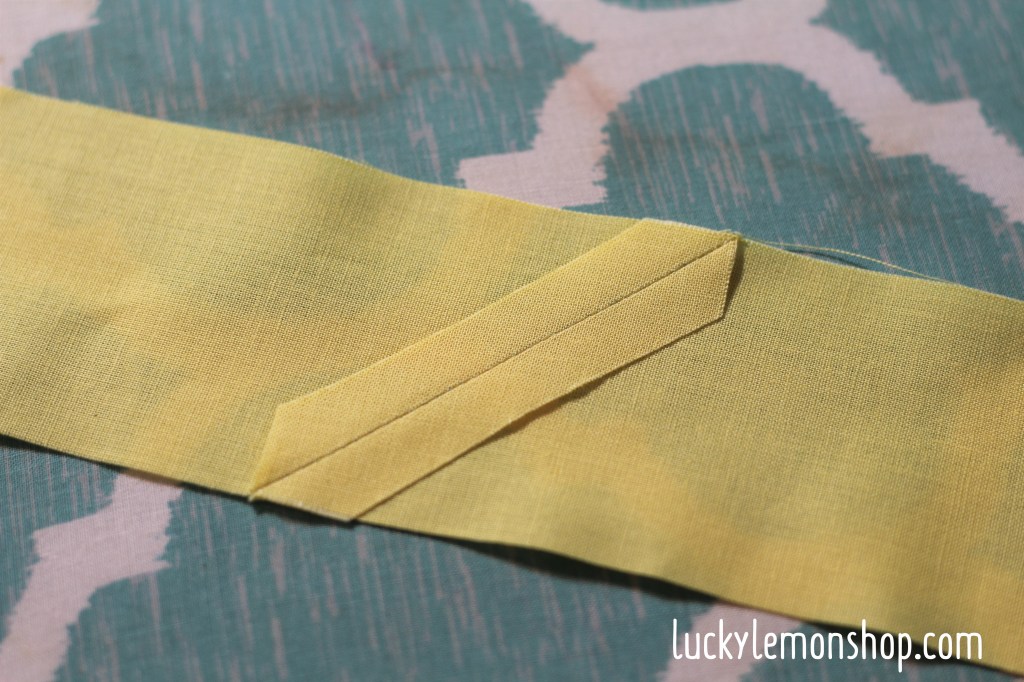
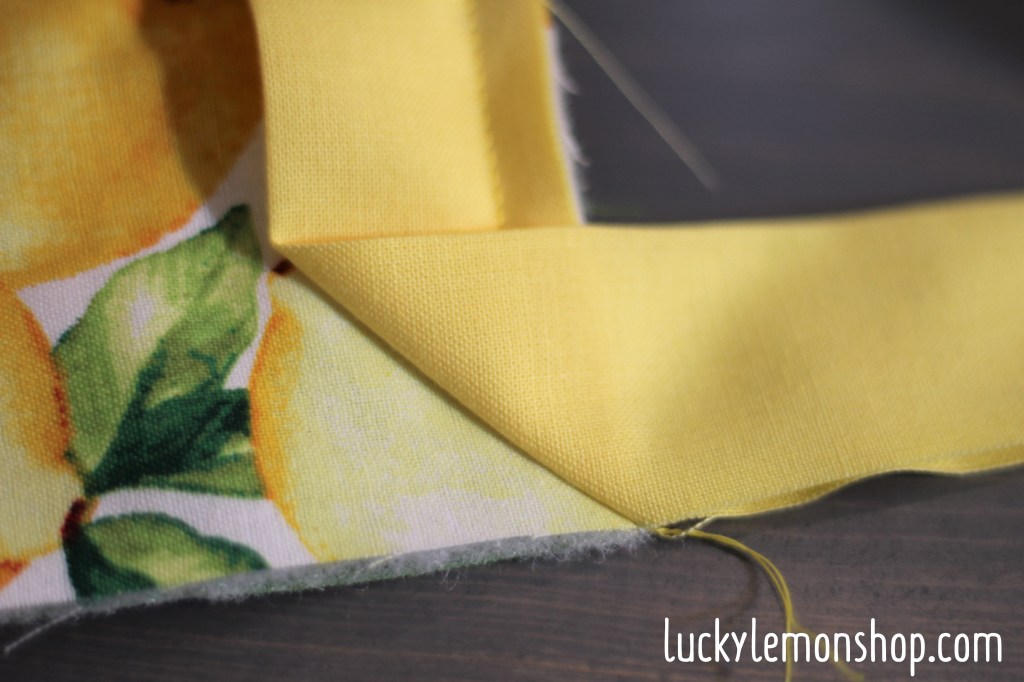
These tails need to overlap exactly the same amount of the width of your binding, which in this case is 2.5″. Don’t give yourself extra room or else your binding will pucker, if anything go about an 1/8″ smaller than your binding width in this overlap. Trim your binding and get ready to sew the tails together EXACTLY how to sewed your strips together before they were attached.
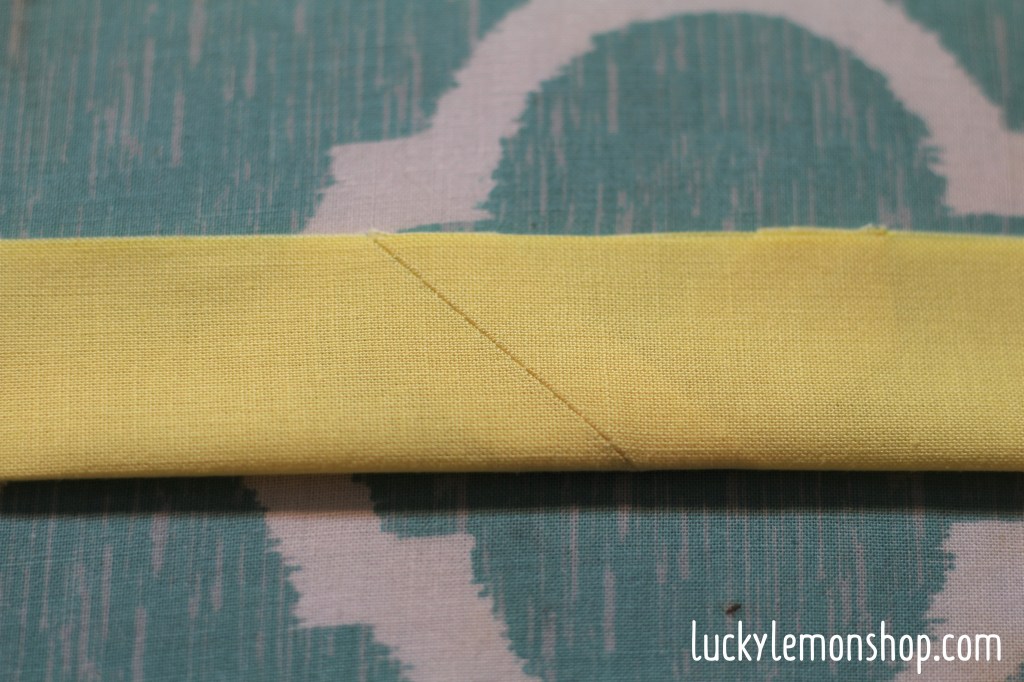
Unfold the binding. The binding tail on the right is now your bottom layer and going out to the left and the binding tail on the left is your top layer and now pointing down. Once again, sew from top to bottom on the 45 degree angle. If it is super hard for your to manage this, because you are now sewing binding with an entire quilt attached… it usually helps me to have longer tails. I will just seam rip a little of the binding off to give me 6-8″ tails on each end and that helps a lot!

Once again, when using solid fabrics, I still don’t feel like I trust myself! I have often twisted my bindings and sewed it together wrong. This never happens to me with patterned fabrics because I know exactly which are the right sides to sew together. To make sure I did it right, I pull my binding and make sure that the raw edges are on the inside and make sure the binding is taught and not twisted. Do this BEFORE you trim and press the little corner off, just in case! Luckily, fabric is forgiving and as long as you don’t cut too soon, you can always seam rip and try again.

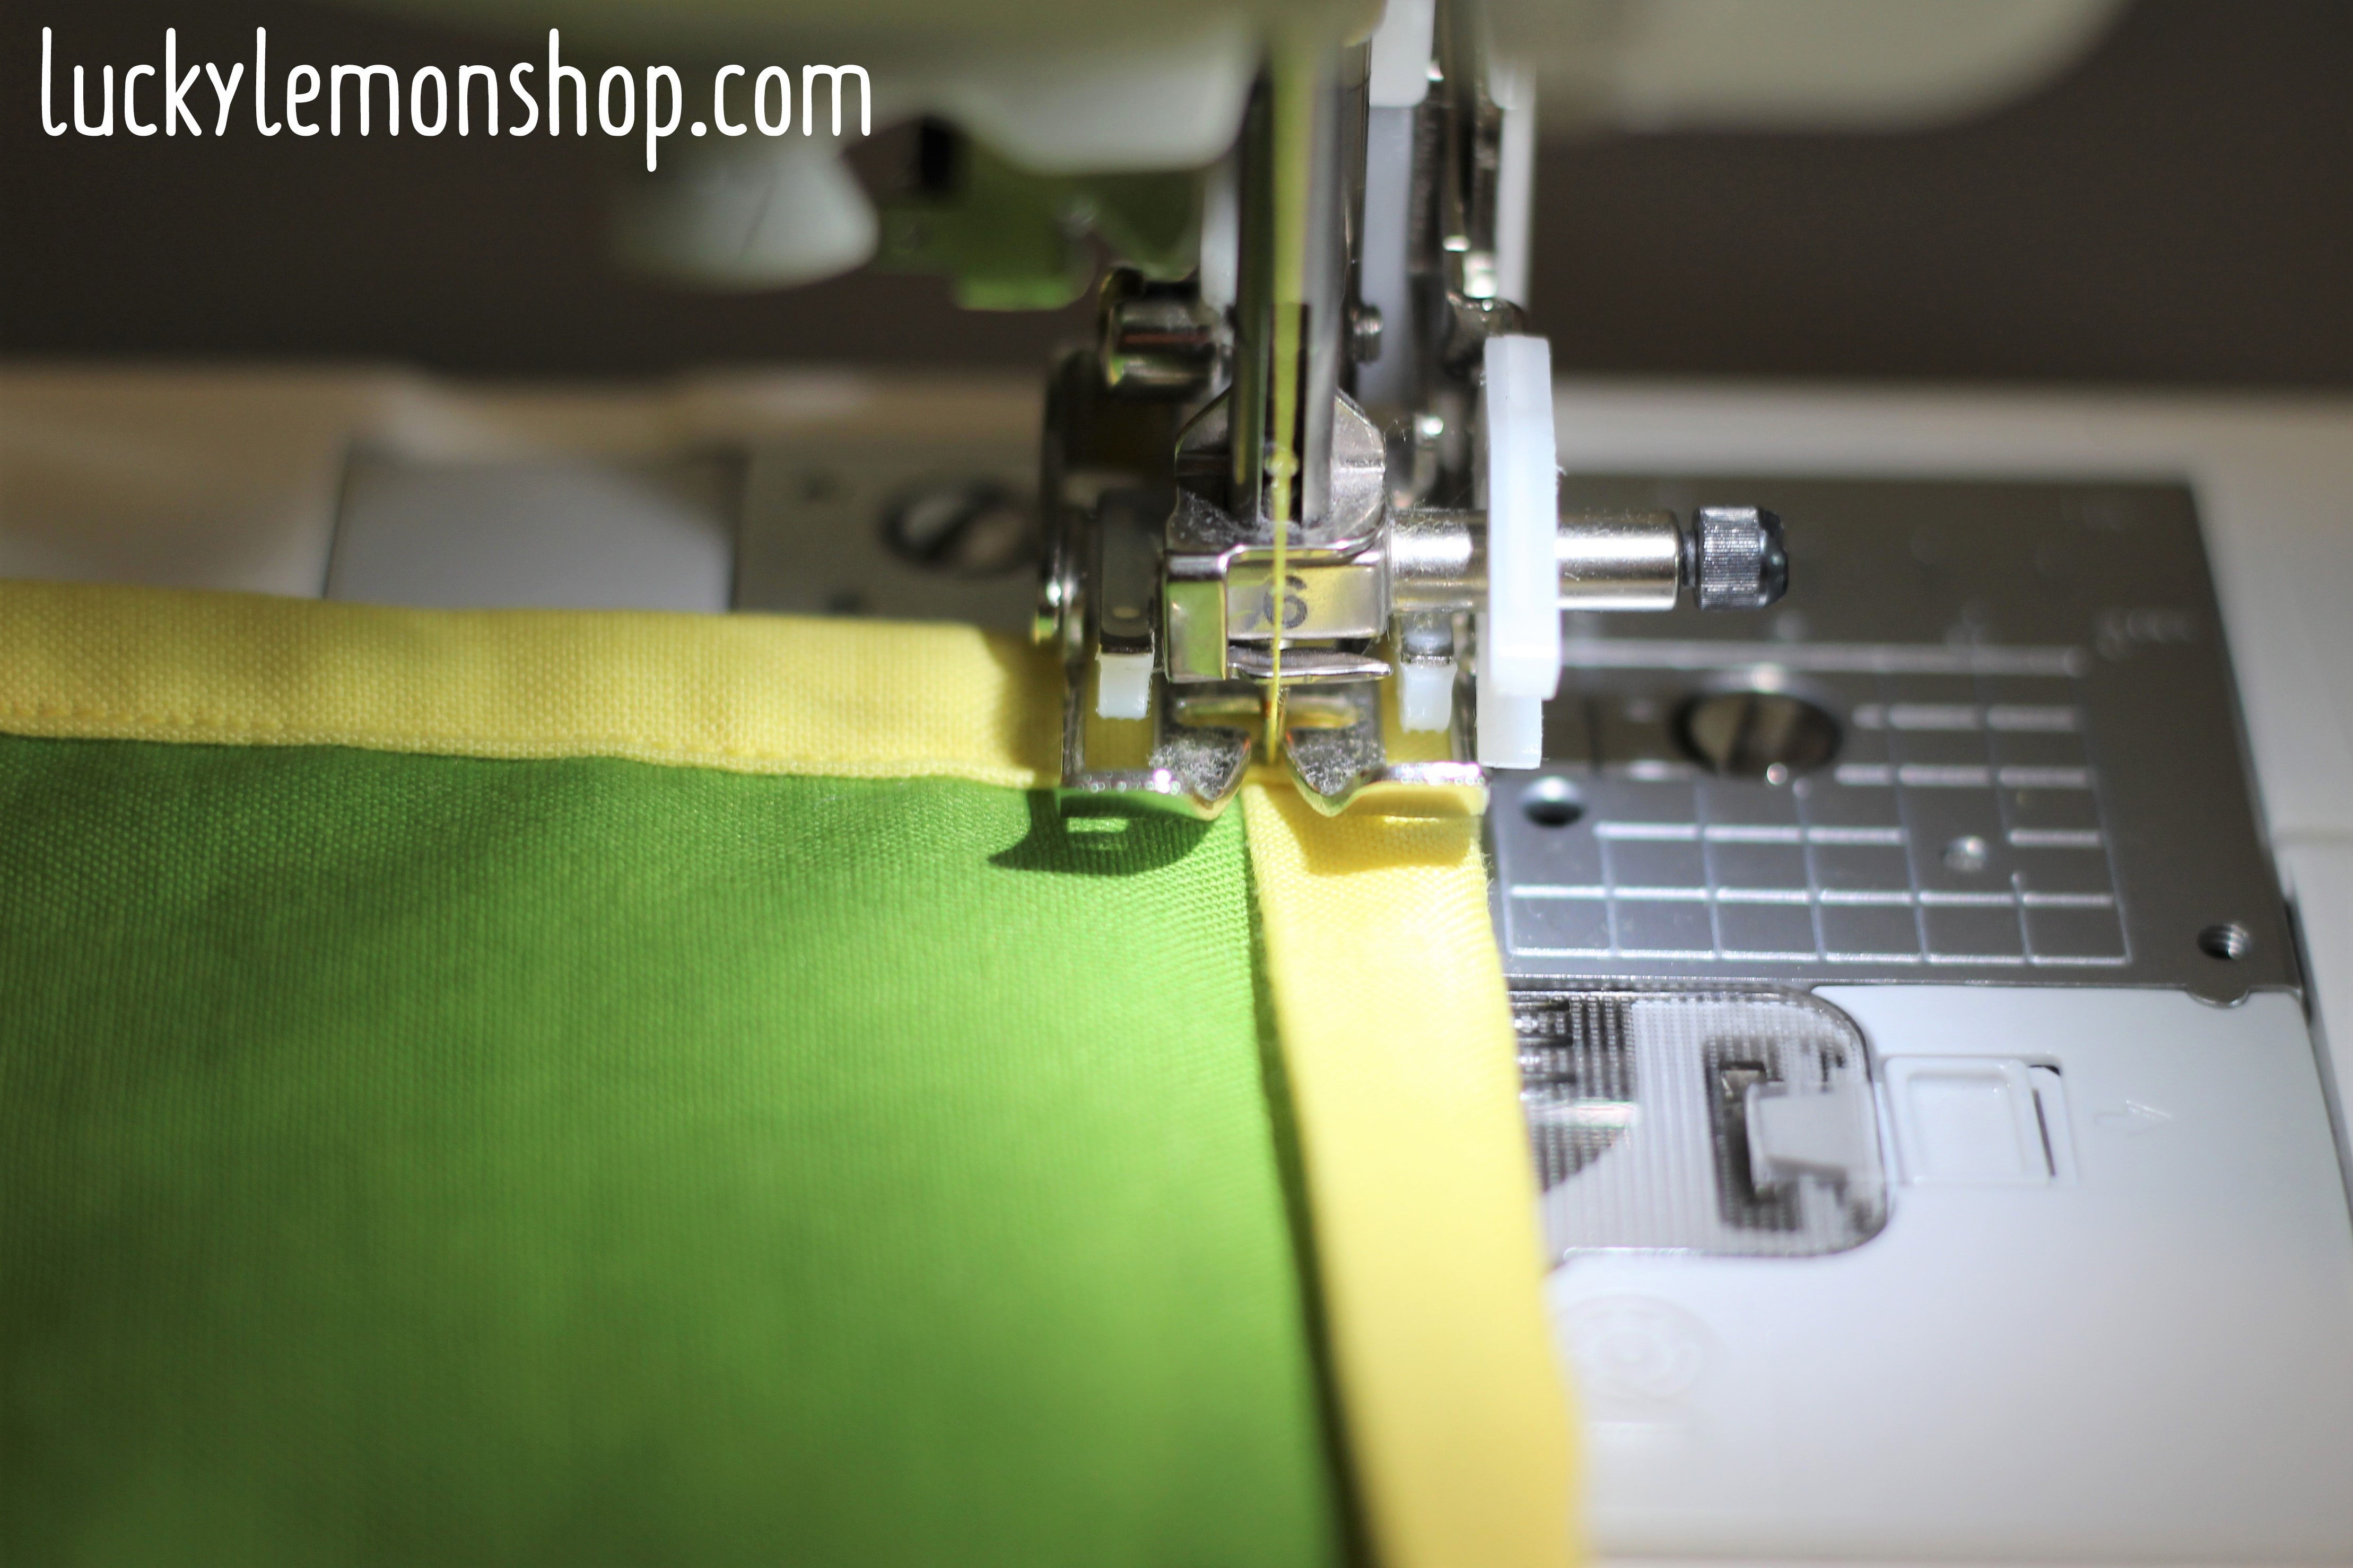
Sew down this last little section to the back of the quilt and flip the whole thing over. Now switch to your walking foot. There is a great post about the joys of quilting with a walking foot and sewing the binding on with a walking foot is just as wonderful. Walking feet can be easily purchased via amazon and I have noticed no different between these and the name brand ones that as 5x as expensive. With your quilt right side up, starting in the middle of a side, pull the binding fabric towards the front of the quilt.
As you pull the binding over, you will start to see the magic. All those raw edges will start to disappear as you sew the binding on. I stay as close to the edge as I can and always use coordinating thread.
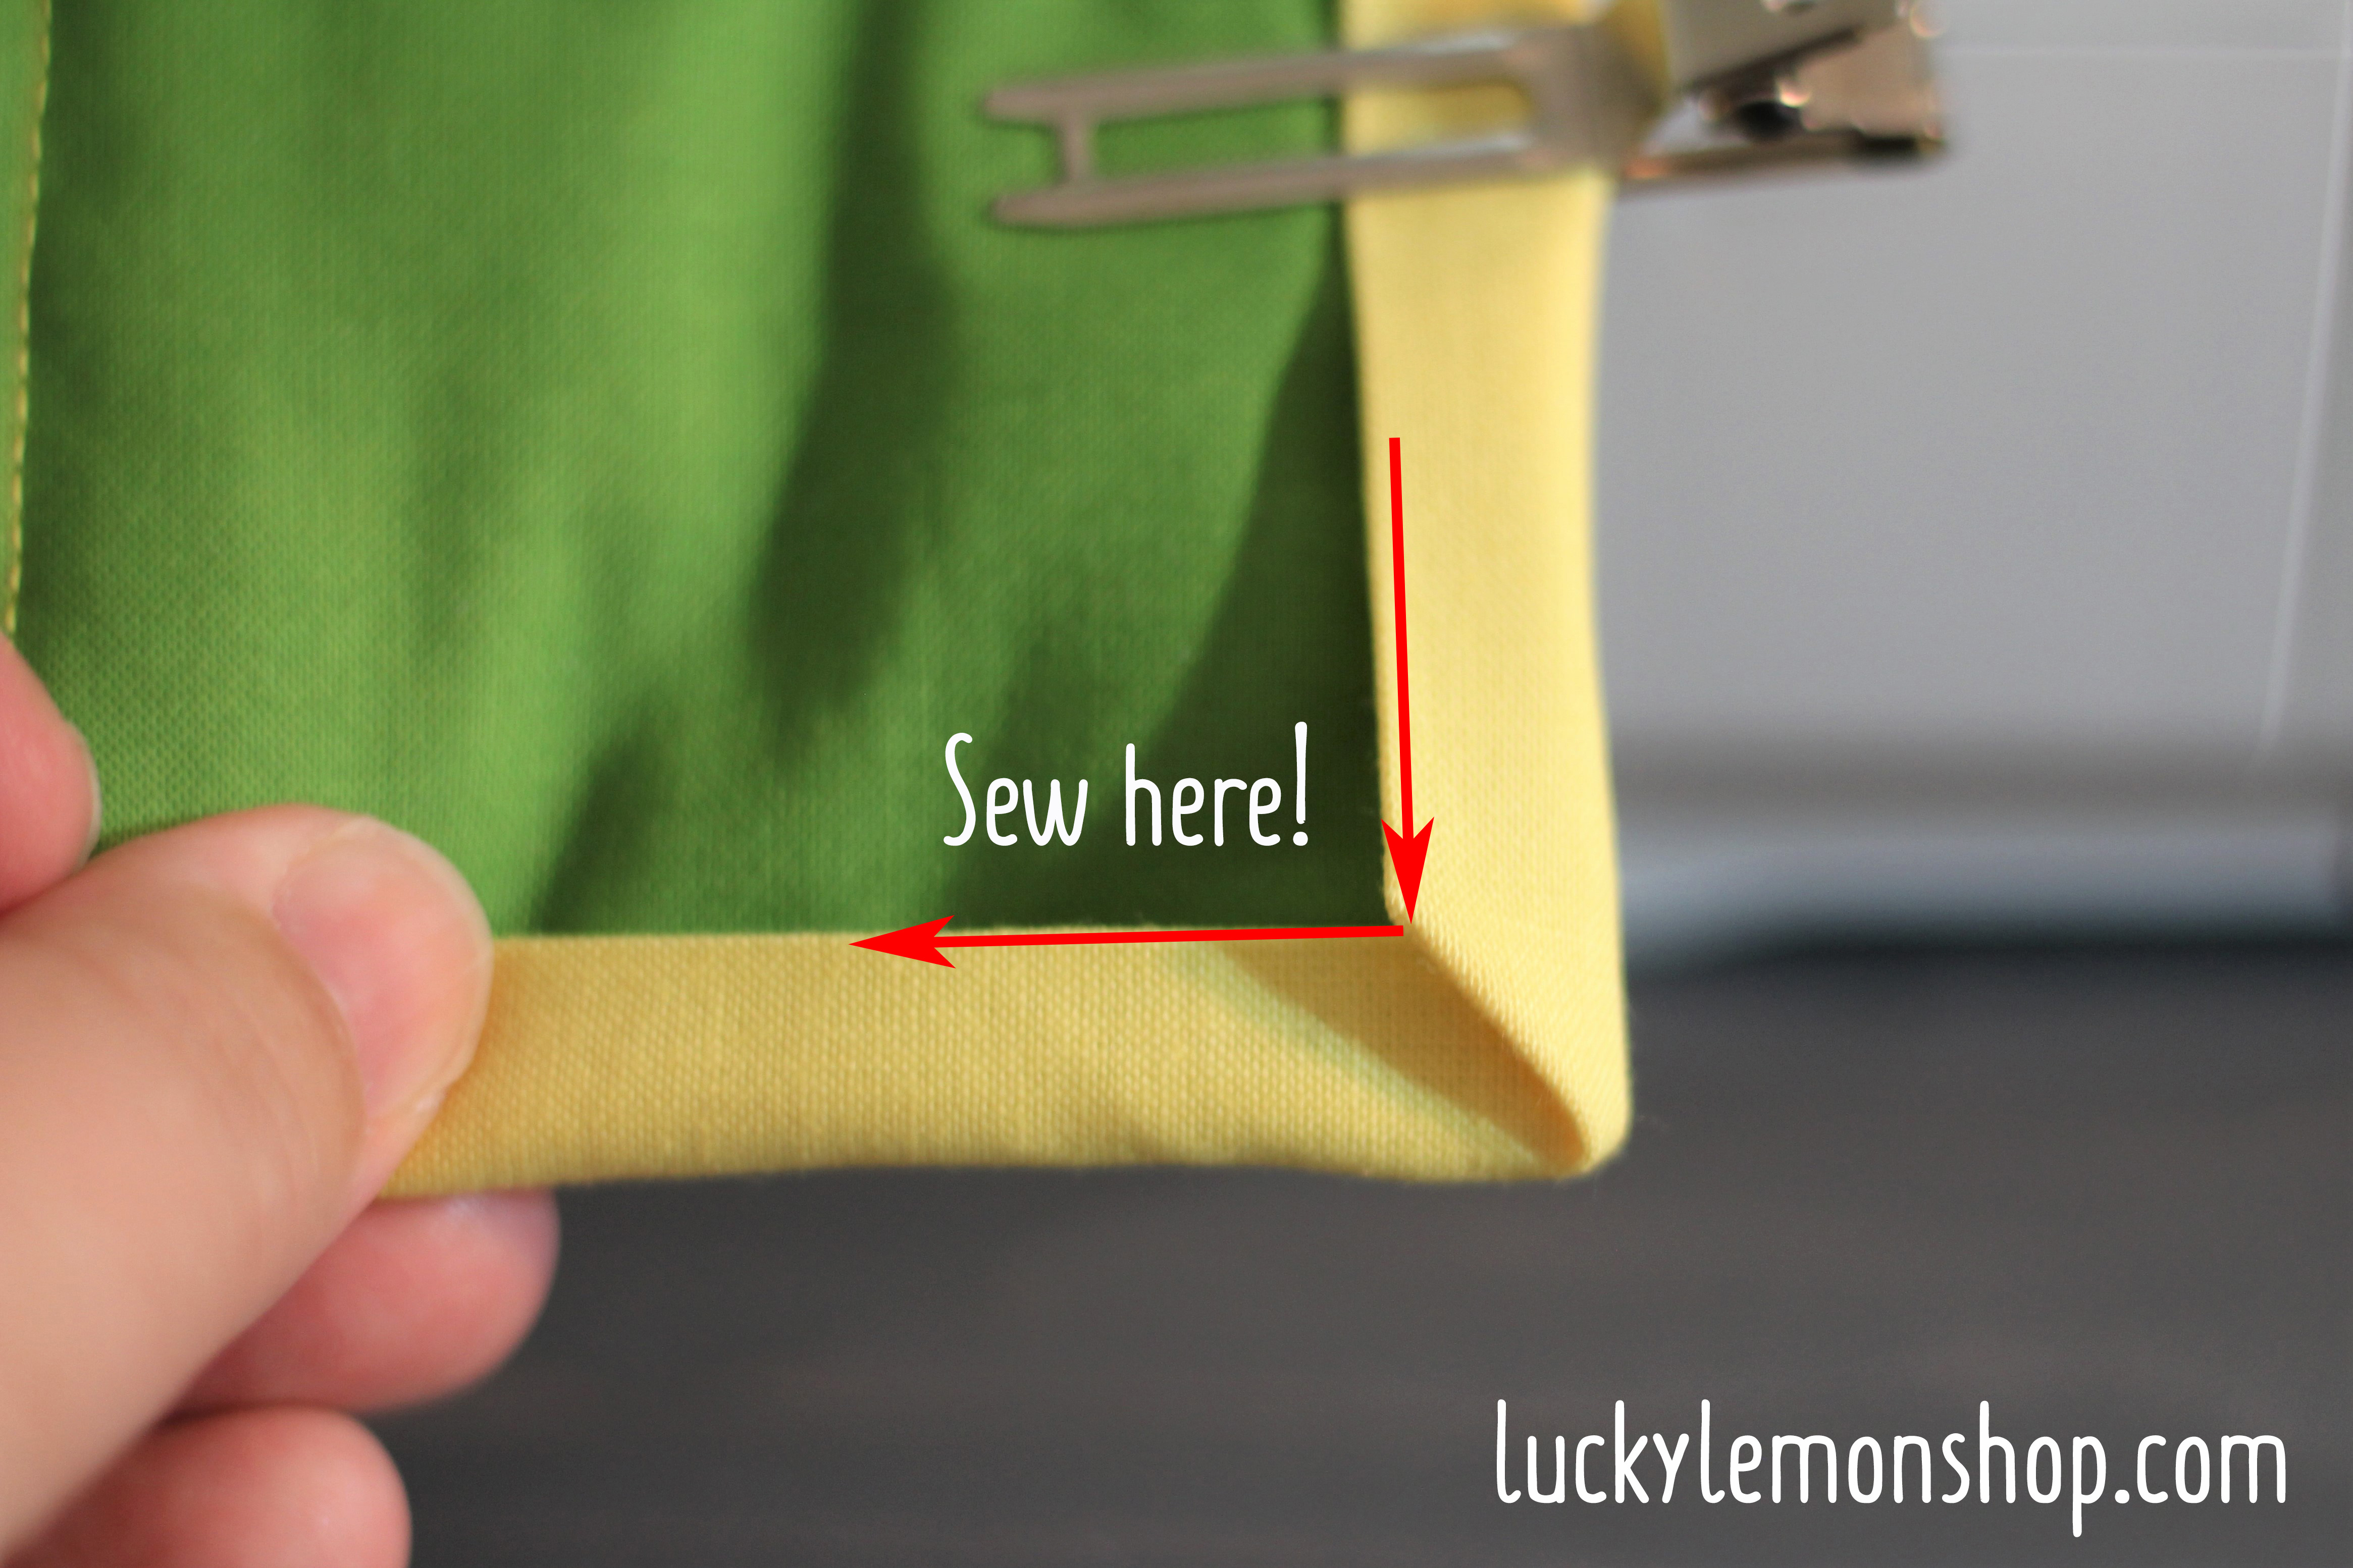
Now for when you get to a corner! Because of our prep work on the back of the quilt, the corners are going to be mitered, which is what really makes a quilt look good in my opinion. When you get about 4-5″ from a corner, fold the bottom side up. I use clips to secure this.

Now fold the right side over! Sometimes I have to finagle the corner a little to get the perfect 45 degree miter and sometimes it helps to stick something like a chopstick down in the corner to poke it out a bit. BUT because of that little 45 degree seam you made on the back that was 1/4″ away from the edge, this miter comes out almost perfectly every time.

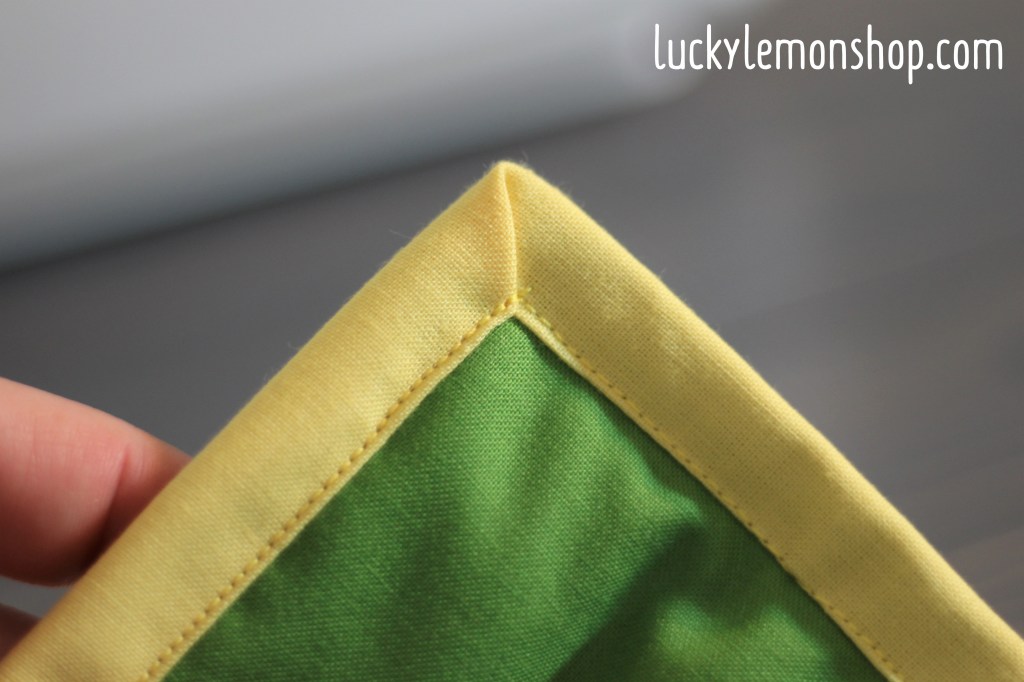
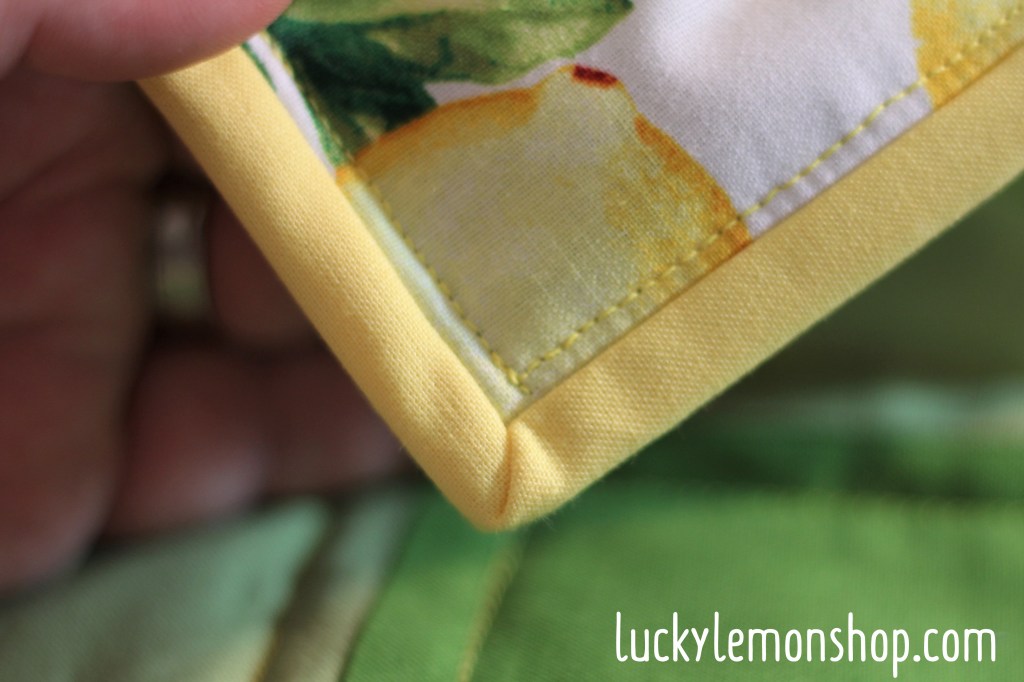
Now sew down to the top edge of the miter, stop with the needle down, and pivot to go down the other side. I sometimes back stitch 2-3 stitches at the corner to make sure it is all really secure.
Now sit back and enjoy the beauty of your corner. Repeat around all 4 sides until your complete your quilt. Below shows the corner from the front and the corner from the back.
CONGRATULATIONS!!!! You have finished your first quilt and are now a quilter. I hope you enjoyed these quilting basics posts and I hope they were helpful in your quilting journey.